Sip in Style: How to Create the Ultimate DIY Beverage Bar with Infused Waters and Mocktails
Hosting friends or just elevating your everyday hydration doesn’t require a fully stocked bar or professional mixology skills. With a little creativity and the right ingredients, you can craft a stunning DIY beverage bar that offers refreshing, flavorful, and alcohol-free options for any occasion. From colorful infused waters to artfully layered mocktails, the modern drink station is more than just a thirst-quencher—it’s a conversation starter, a health boost, and a display of personal taste.

In a world increasingly driven by wellness, many are turning away from sugary sodas and alcoholic drinks in favor of clean, creative alternatives. Enter the beverage bar: a self-serve drink station that invites guests to experiment with flavors, hydrate in style, and engage with the experience. Whether you’re throwing a baby shower, hosting a summer brunch, or just want to impress family at Sunday dinner, crafting your own drink bar brings elegance and fun to the table—without the need for a cocktail shaker.
Let’s explore how to build your perfect DIY beverage bar, with all the essentials for making homemade infused waters and sophisticated mocktails that look as good as they taste.
Why Go DIY with Your Drinks?
A do-it-yourself beverage station isn’t just a trend—it’s a smart, flexible, and health-forward way to entertain or treat yourself. Here’s why:
It’s Inclusive: Mocktails and infused waters are ideal for guests who don’t drink alcohol, including children, pregnant individuals, or those simply aiming for a healthier lifestyle.
It’s Affordable: You don’t need pricey spirits or exotic syrups. Many ingredients can be found in your garden, fridge, or local grocery store.
It’s Customizable: Guests can mix and match flavors, sweeteners, garnishes, and even levels of fizz. No two drinks need to be the same.
It Looks Amazing: A beautifully arranged beverage bar adds a visual wow factor to your setup—especially with vibrant fruits, herbs, and colorful liquids.
Step One: Setting Up Your Beverage Bar Space
Before you dive into the drinks themselves, consider your layout and presentation. Whether you’re setting up a table, a kitchen island, or a cart, you want your drink station to feel both welcoming and functional.
Must-Have Elements:
A Flat Surface or Serving Cart: Ensure you have enough room to display ingredients, glassware, and decorative elements.
Clear Labels: Small signs or chalkboards make it easy for guests to know what they’re pouring.
Tongs and Spoons: For sanitary and easy handling of garnishes and mix-ins.
Glassware or Cups: Mason jars, stemless glasses, or even paper cups can work, depending on the vibe.
Ice Station: A large bowl or cooler of ice is essential for keeping drinks fresh and cool.
Pitchers and Dispensers: Use see-through containers to show off the beautiful colors and floating ingredients in your drinks.
Bonus: Add a mirror or a tray to elevate the aesthetic and organize the space more cleanly.
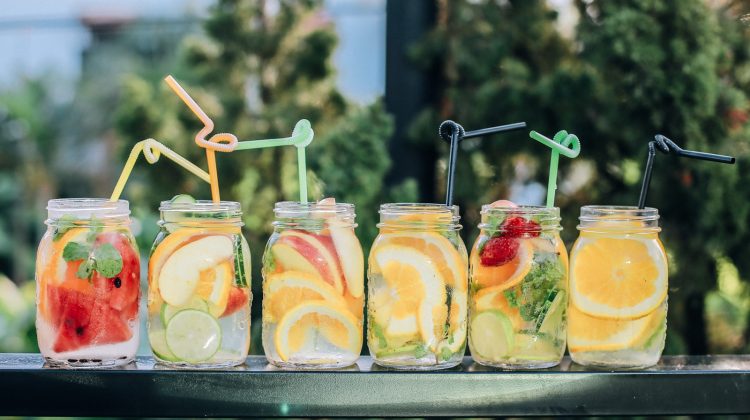
Step Two: Infused Water—Hydration That Wows
Infused waters are as simple as they are stunning. They not only encourage hydration but also offer a flavorful alternative to plain water or sugary beverages—perfect for summer gatherings, wellness-themed events, or casual daily sipping.
Popular Infusion Combinations:
Cucumber + Mint + Lime
Cool, refreshing, and spa-worthy.
Strawberry + Basil
Slightly sweet with an herbal twist.
Citrus Medley (Lemon + Orange + Grapefruit)
Zesty and invigorating.
Pineapple + Rosemary
Tropical with a savory edge.
Blueberry + Lavender
Subtle, floral, and soothing.
Tips for Perfect Infused Waters:
Use filtered or spring water for the cleanest taste.
Let ingredients sit for at least 30 minutes before serving (or refrigerate overnight for deeper flavor).
Gently muddle herbs like mint or basil to release their oils, but don’t crush them completely.
Use frozen fruit in place of ice to chill and infuse at the same time.
Keep a slotted spoon nearby to scoop out ingredients as needed.
Infused water is especially great for outdoor events—set up a few dispensers with different combinations and let guests refill at will.
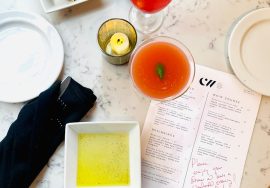
Step Three: Crafting Delicious, Booze-Free Mocktails
Mocktails have come a long way from being just juice in a fancy glass. Today, they’re thoughtfully composed drinks with layers of flavor, texture, and aroma. Done right, they’re every bit as satisfying as their alcoholic counterparts.
Essential Mocktail Ingredients:
Base Liquids:
Sparkling water
Tonic water
Coconut water
Fresh-pressed juices (citrus, cranberry, apple, pomegranate)
Flavor Boosters:
Herbal teas (chilled chamomile, green tea, or hibiscus)
Shrubs (vinegar-based syrups)
Flavored syrups (honey-ginger, lavender, vanilla)
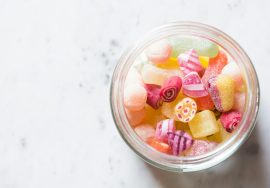
Garnishes & Add-ins:
Fresh herbs (mint, basil, rosemary)
Citrus slices or peels
Edible flowers
Fruit skewers or muddled berries
Sugar or salt for rim-coating
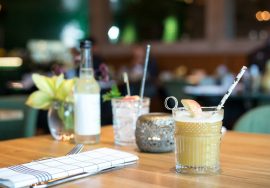
Three No-Fail Mocktail Recipes to Try:
Citrus Fizz
½ cup orange juice
¼ cup lemon-lime sparkling water
Dash of grenadine or pomegranate syrup
Garnish with an orange wheel and sprig of mint
Berry Smash
Handful of mixed berries (muddled)
1 tsp honey or agave
1/2 cup chilled green tea
Sparkling water to top
Serve over crushed ice with basil leaves
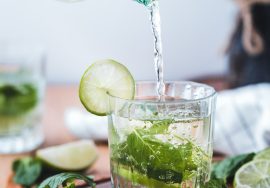
Virgin Mojito
Juice of half a lime
6-8 mint leaves (muddled)
1 tsp sugar or honey
Club soda
Garnish with more mint and a lime wedge
Encourage guests to customize—maybe they want to swap out the citrus for ginger ale or add muddled fruit to a basic tea mix. Provide simple instructions or mix-and-match recipe cards at your beverage station.
Step Four: Presentation is Everything
How your beverage bar looks matters almost as much as how it tastes. Elevate the experience with small visual and sensory touches:
Use glass containers so guests can admire floating fruit, ice, and herbs.
Add color with sliced citrus wheels, berries, and edible flowers.
Display garnishes in small bowls or mini mason jars.
Incorporate textures like wood cutting boards, linen napkins, or marble trays.
Use tiered stands to maximize space and add dimension.
If it’s an evening event, add string lights or candles for a cozy, festive vibe.
Step Five: Make It Interactive and Fun
A DIY beverage bar isn’t just about hydration—it’s an experience. Encourage guests to participate and play:
Create a “Build-Your-Own” menu with easy mocktail combos.
Offer name tags so guests can label their creations.
Set up a photo corner with glasses and garnishes for Instagram-worthy pics.
Have taste-test cards where guests can rate their favorites.
Include a “wild card” ingredient—like jalapeño slices, matcha powder, or tamarind paste—for adventurous sippers.
Final Pour: Everyday Elegance Meets Easy Execution
You don’t need a mixology license or a fridge full of fancy ingredients to wow your guests—or yourself. A thoughtfully curated beverage bar, stocked with fresh fruits, fragrant herbs, and a few clever combinations, is all it takes to transform hydration into celebration.
Whether you’re planning a summer garden party, a family movie night, or a mid-week self-care session, your DIY drink station can evolve to fit the vibe. Simple, inclusive, and endlessly customizable, infused waters and mocktails aren’t just alternatives—they’re stars in their own right.
So go ahead—slice the citrus, chill the glasses, and start sipping in style.